Obtaining a SAS token
Using Azure Storage Explorer
Download and install Azure Storage Explorer, if you haven't done so already.
Launch Azure Storage Explorer and sign in with your Azure credentials.
Once signed in, navigate to your Azure Blob Storage account in the Azure Storage Explorer interface.
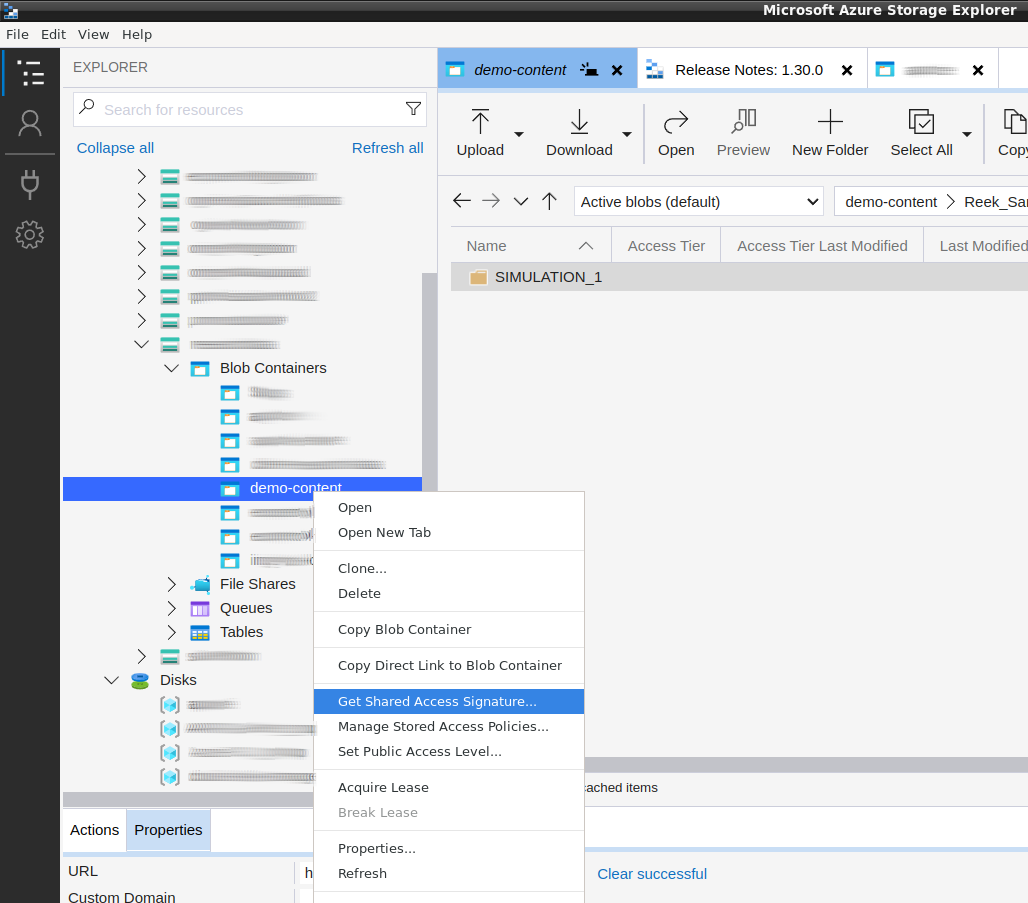
Locate the Storage Account Container that contains the folder you want to access and open the context menu by clicking the right mouse button. Select the Option "Get Shared Access Signature".
You should be presented with a view to configure a SAS Token.
When generating SAS tokens, set a reasonably short expiry time for the SAS token to enhance security. This helps minimize the window of vulnerability in case the token gets compromised. Except for very big datasets, 1 day should be more than enough.
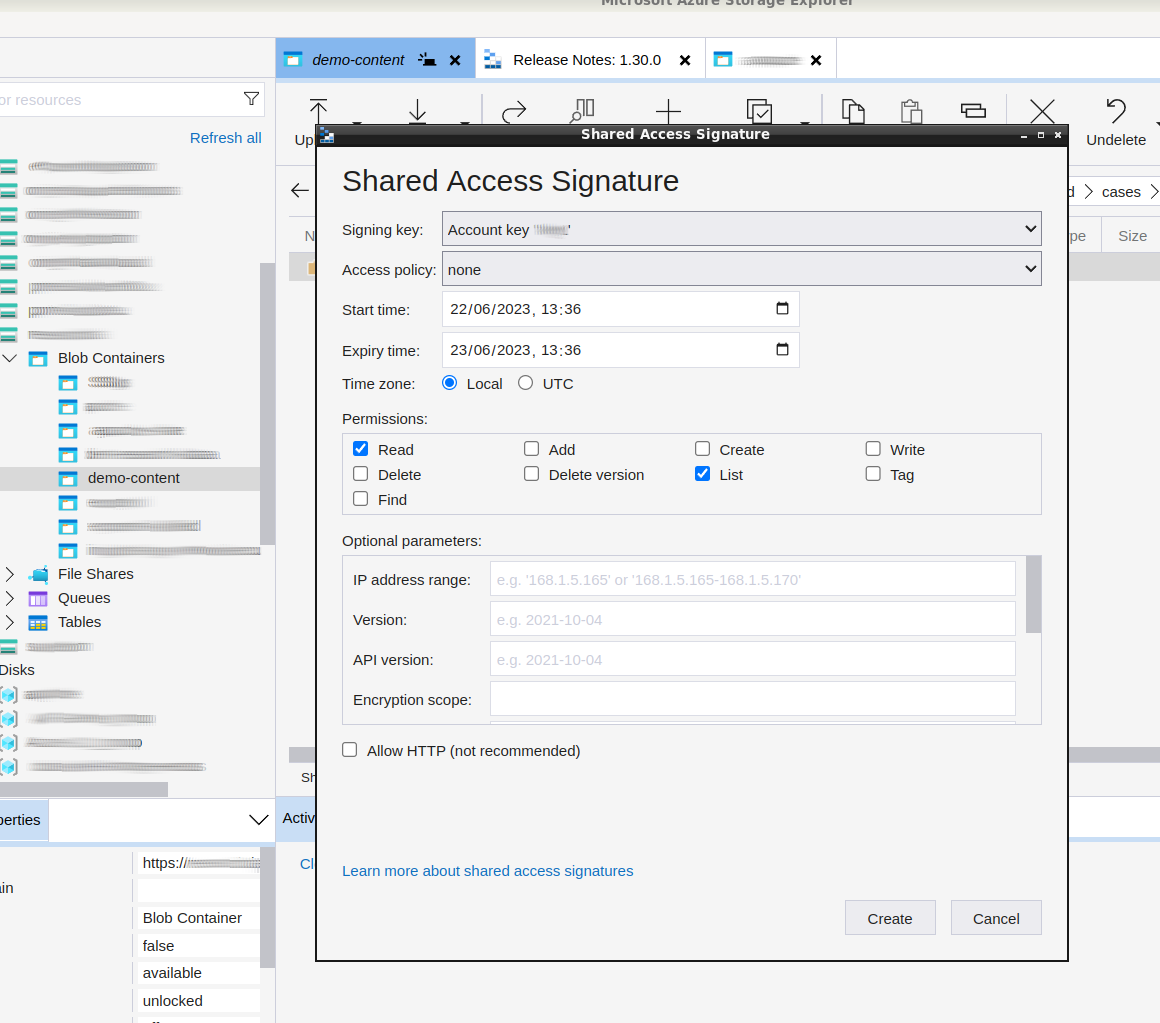
In order for the Proteus CLI to work properly, at least the
ReadandListpermissions are needed. Ensure these permissions are selected in the Permissions section.
Click on the Create button. Copy the content on the SAS token section and save it for later.
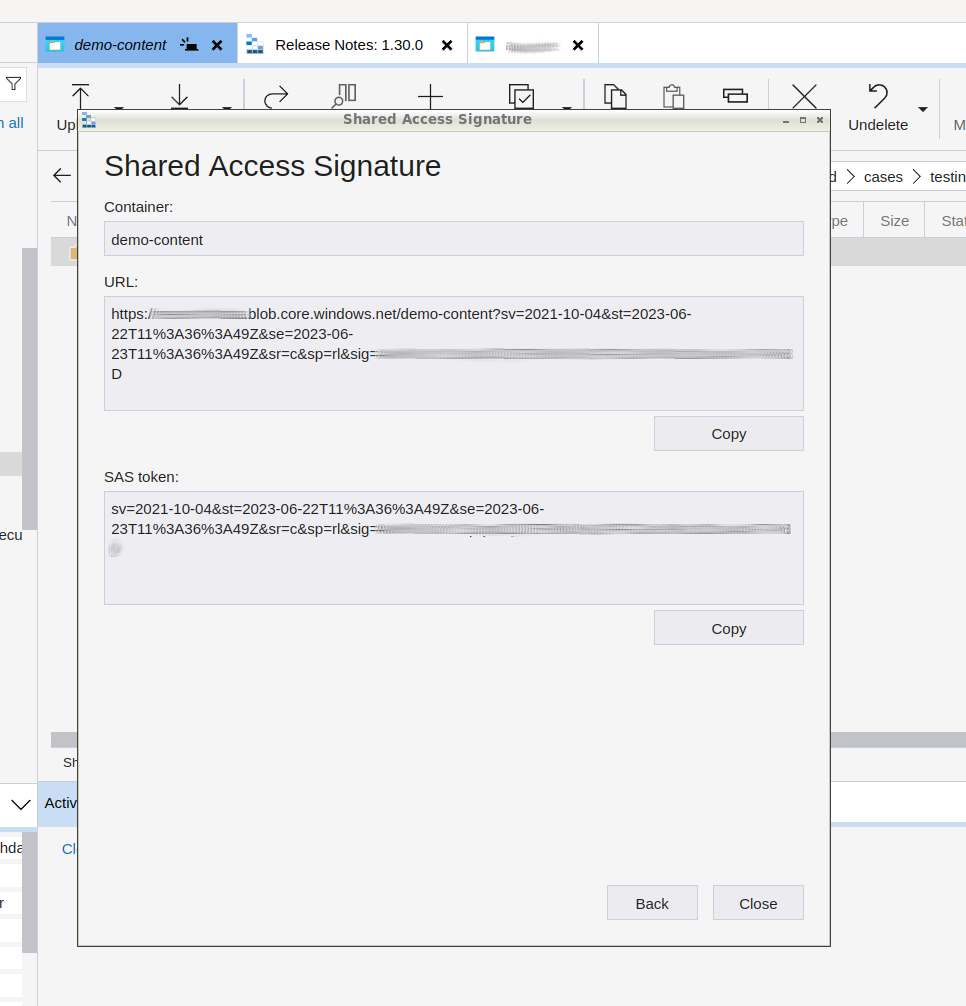
It should look similar as follows:
sp=<permissions>&st=<start-time>&se=<expiry-time>&sv=<sas-version>&sr=<resource-type>&sig=<signature>
From Azure Portal
Open the Azure portal and navigate to your Azure Blob Storage account.
In the Azure Blob Storage account, locate the Storage Account that contains the Blob container storing the dataset folder you would like to use with the Proteus CLI.
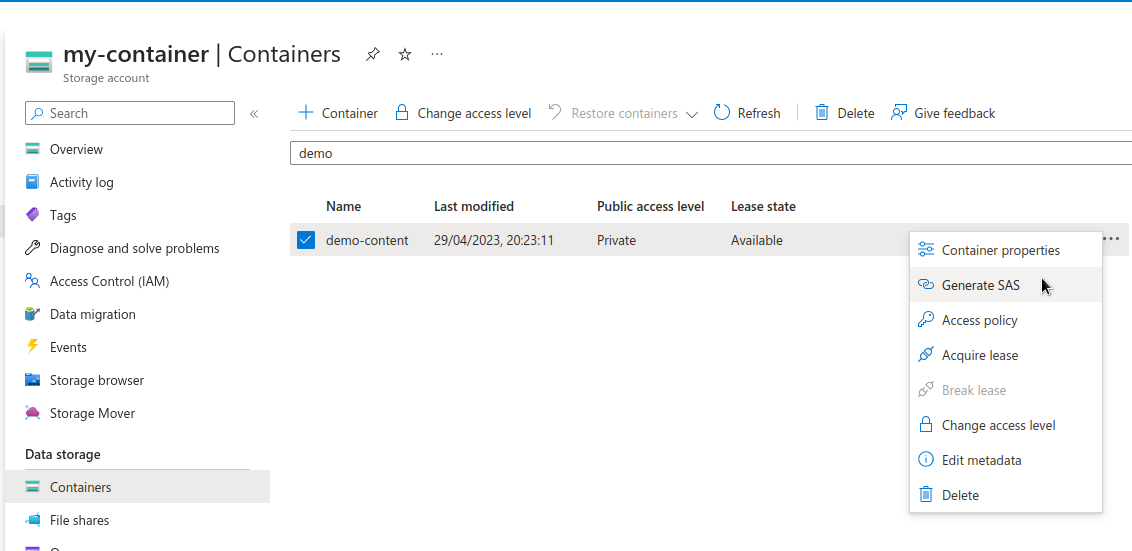
In Storage Account's left menu, click and navigate to the Containers section.
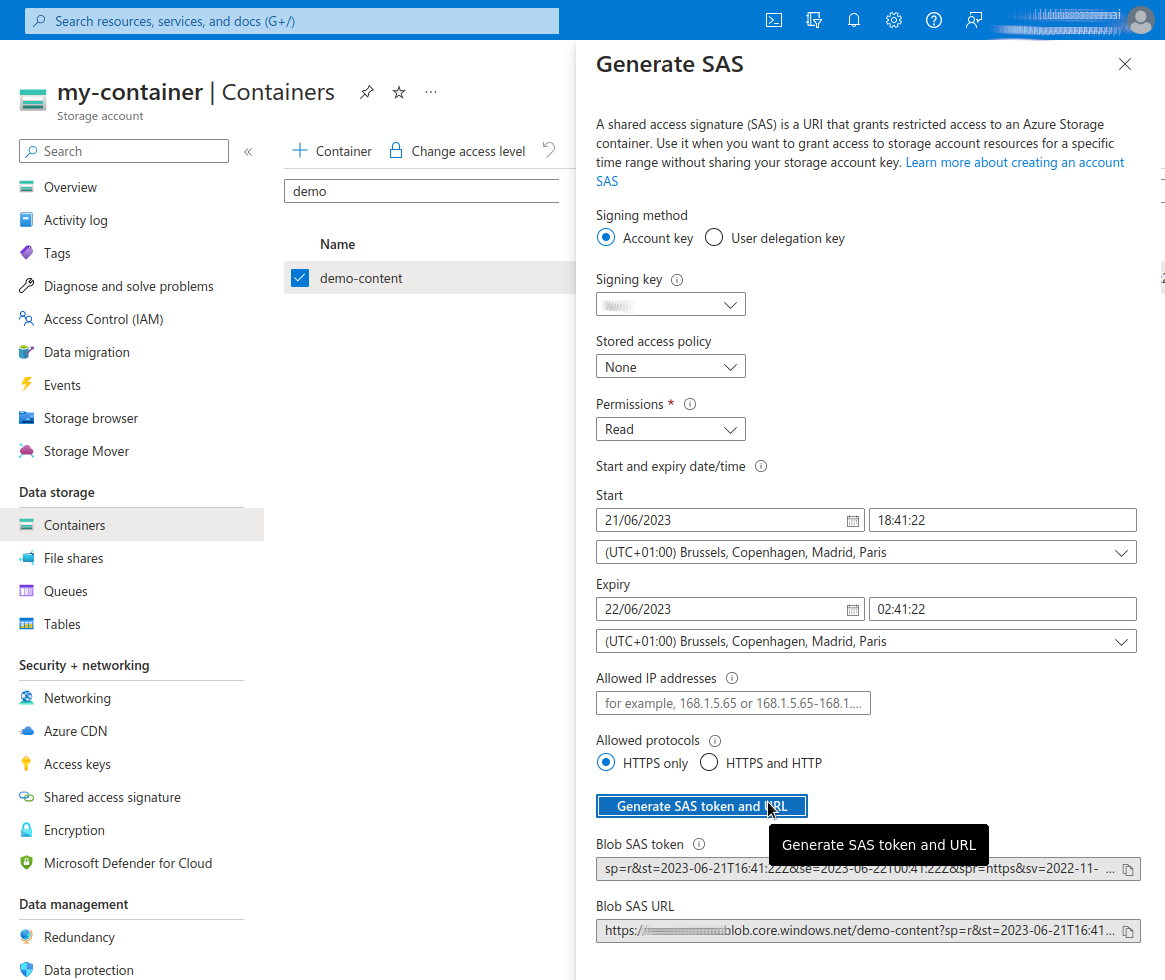
Select the container where the folder you would like to use is placed. Click on the three dots at right and select Generate SAS.
When generating SAS tokens, set a reasonably short expiry time for the SAS token to enhance security. This helps minimize the window of vulnerability in case the token gets compromised. Except for very big datasets, 1 day should be more than enough.
In order for the Proteus CLI to work properly, at least the
ReadandListpermissions are needed. Ensure these permissions are selected in the Permissions dropdown.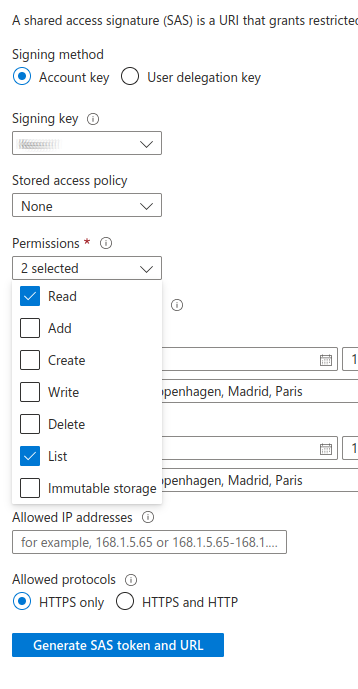
Click on the Generate SAS token and URL button. Copy the content on the Blob SAS token and save it for later. It should look similar as follows:
sp=<permissions>&st=<start-time>&se=<expiry-time>&sv=<sas-version>&sr=<resource-type>&sig=<signature>