AZ Blob Storage URL for your dataset
As learned in the previous section, an Azure Blob Storage URL with SAS credentials consists of two parts, the resource URL and the permissions token.
In this section we are going to learn how to obtain the first part of the URL, using two different methods.
Using Azure Storage Explorer
Azure Storage Explorer is by far the easier way to obtain a Blob Storage URL. To do so, follow these steps:
Download and install Azure Storage Explorer, if you haven't done so already.
Launch Azure Storage Explorer and sign in with your Azure credentials.
Once signed in, navigate to your Azure Blob Storage account in the Azure Storage Explorer interface.
Locate the Storage Account Container that contains the folder you want to access.
Expand the Storage Account Container to display its contents.

Illustrative Image: Azure Storage Explorer - Expand Container
Navigate through the folder structure until you reach the desired folder.
Select the folder to display its contents in the right pane of Azure Storage Explorer.
In the right pane, locate the blob or file for which you want to obtain the URL.
Right-click on the blob or file and select Copy URL from the context menu.
The Blob Storage URL to the selected folder or file will be copied to your clipboard.
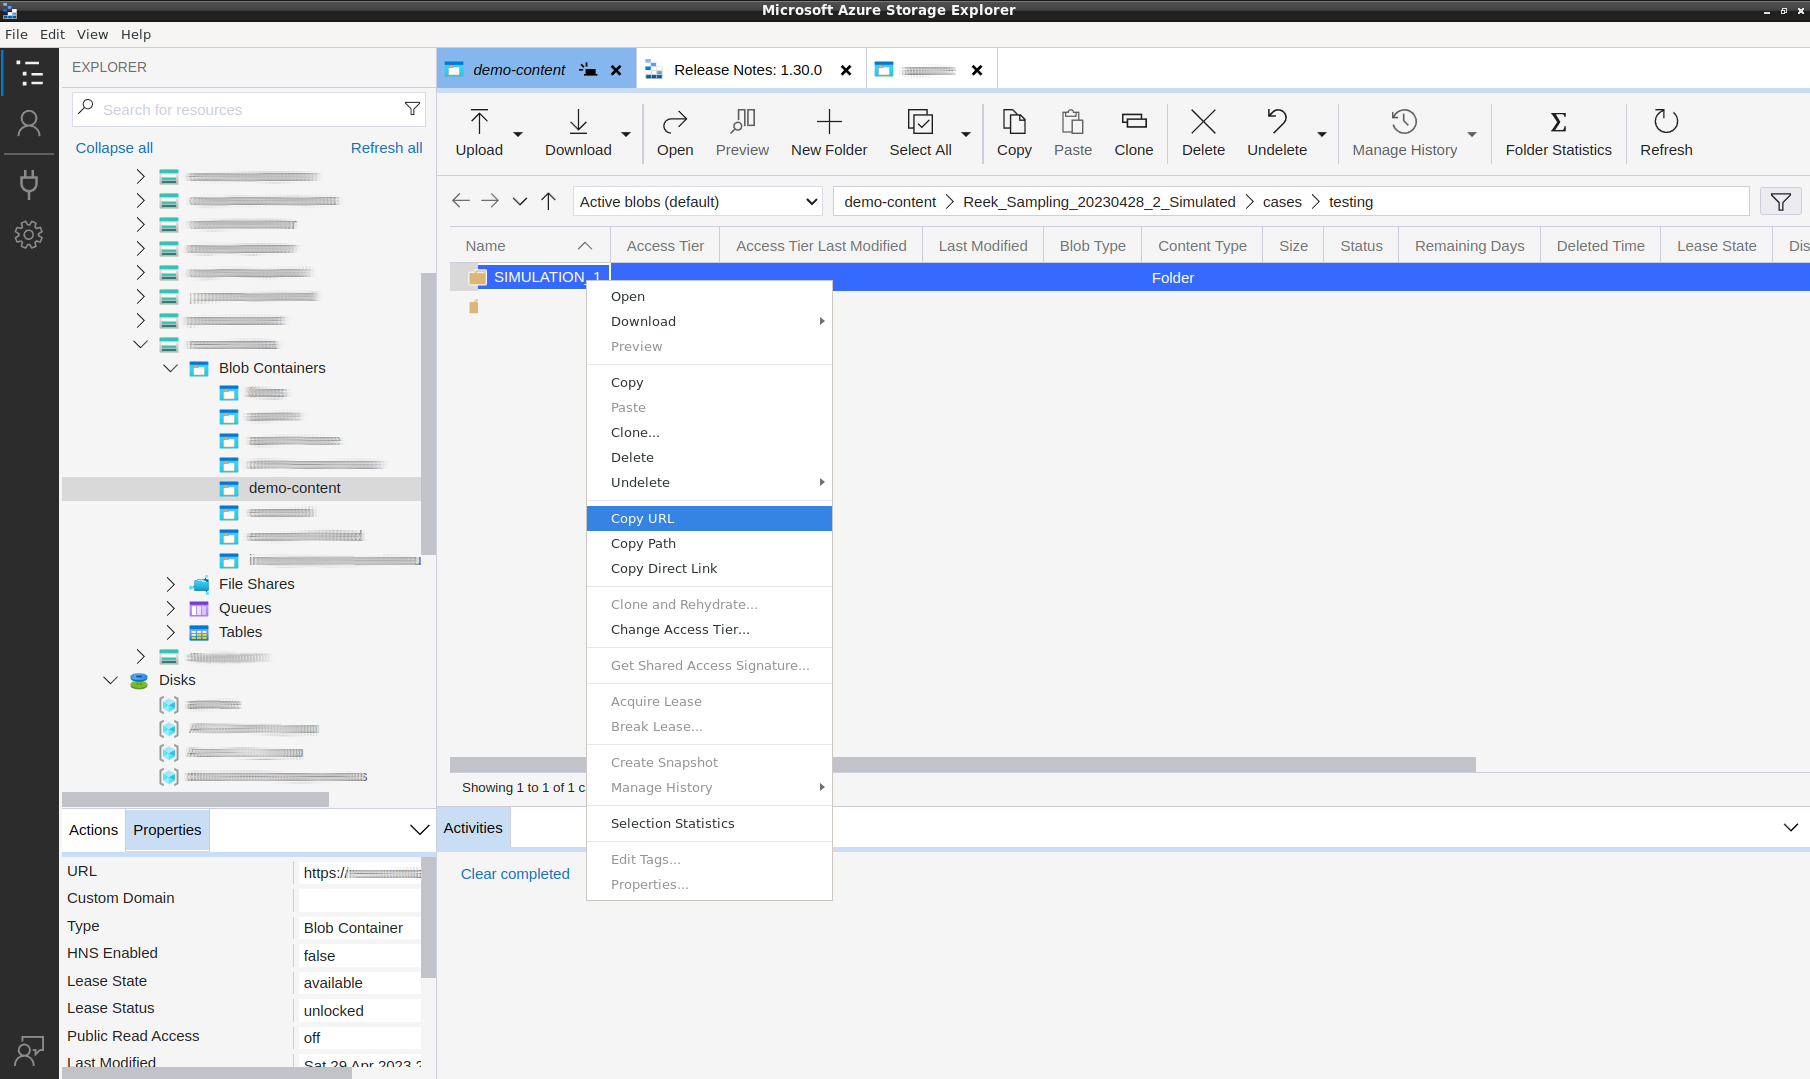
It should look as follows:
https://<storage-account-name>.blob.core.windows.net/<container-name>/<folder_1>/<folder_2>
From Azure Portal
Sadly, Azure portal does not allow you to obtain a full Blob Storage folder URL as with the Azure Storage Explorer. We need to obtain, transform and merge different content obtained from different parts of the UI.
Open the Azure portal and navigate to your Azure Blob Storage account.
In the Azure Blob Storage account, locate the Storage Account that contains the Blob container storing the dataset folder you would like to use with the Proteus CLI.
In Storage Account's left menu, click and navigate to the Containers section.
Select the container where the folder you would like to use is placed. Click on the three dots at right and select Container properties.
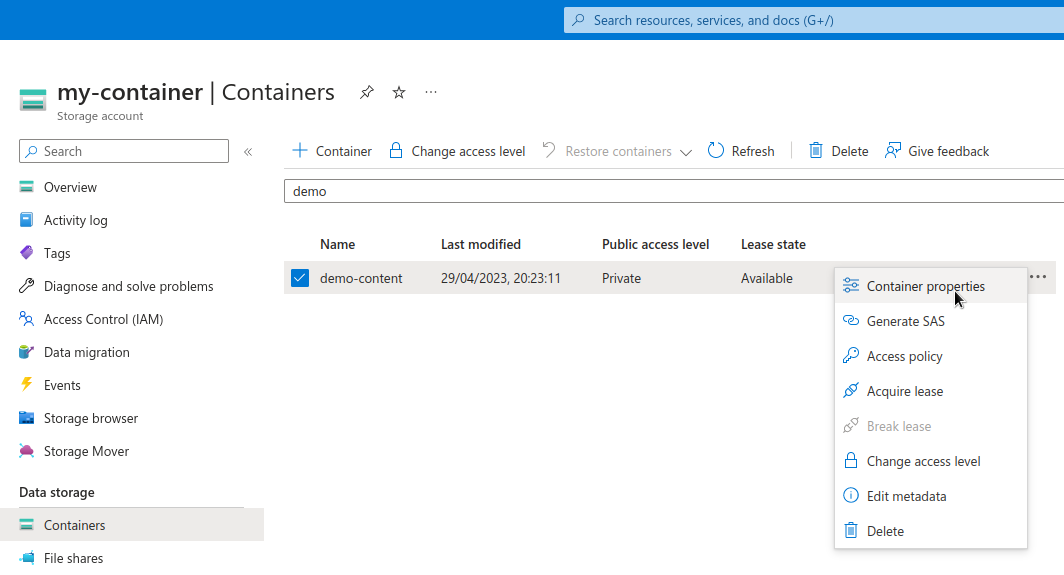
In container properties, copy the content of the URL field and save it for later.

It should look similar as follows:
https://<storage-account-name>.blob.core.windows.net/<container-name>Now that we have obtained Azure Blob Stora URL for the container, we are going to extend it to include the path to the dataset folder to be feed to the Proteus CLI.
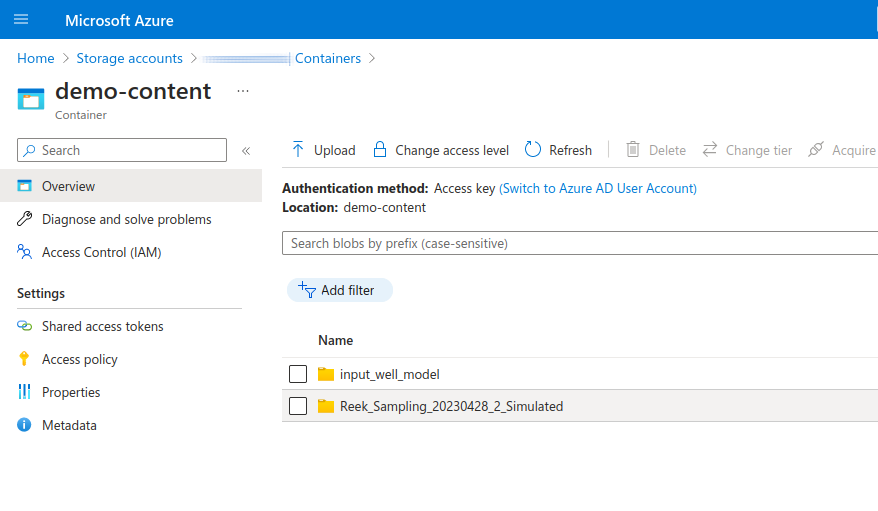
In Storage Account Containers' left menu, click and navigate to the Overview section. You should be presented with a UI to navigate through the Container folders and files.
Once you get to the desired folder, in the top left part of the panel, copy the path to the folder including the slashes, but excluding the first component, which refers to the container.
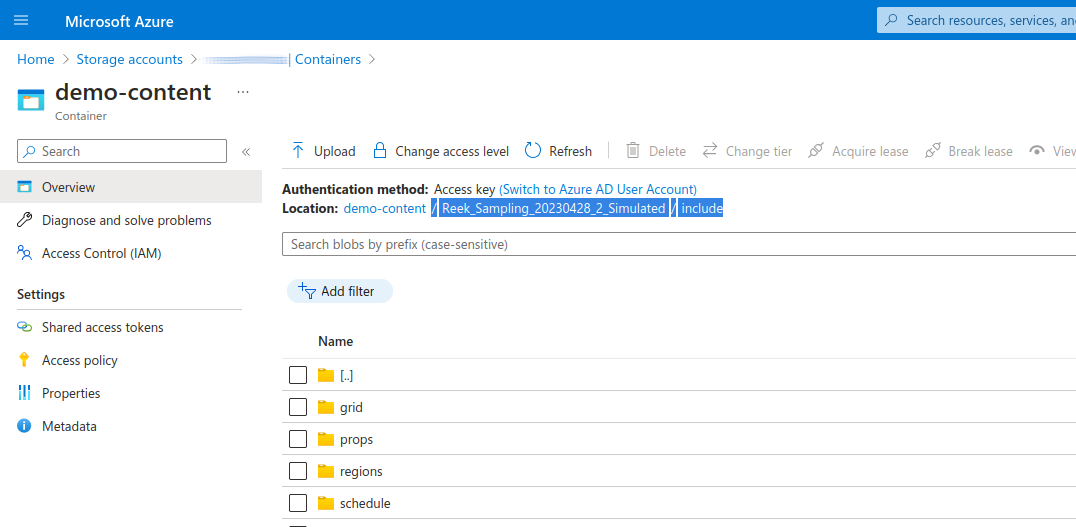
Once copied, it should look as follows
/ <folder_1> / <folder_2>Remove the spaces in between the slashes and the folder names, and append to the container URL we copied before. It should look as follows:
https://<storage-account-name>.blob.core.windows.net/<container-name>/<folder_1>/<folder_2>